What if I told you that making your own sauerkraut was mad easy? What if I told you that it only has two ingredients ... and that neither is vinegar?
I know what you'd say: um ... you already told us all that yesterday. Cabbage. And salt.
Okay then ... besides that?
Oh, this is so exciting, that I'll tell you now.
Ready?
But before I do, to add just a touch of suspense, let me mention that you don't need any fancy-schmancy equipment. No need to sterilize jars or covers, or boil the life out of the cabbage to get rid of bacteria. Because THAT'S the real secret ingredient ... bacteria.
Wait ... what? Bacteria?
Now stop with the ewwwww. Especially if you (by now) peeked at yesterday's post. Because probiotics, in a ton of superfoods that you love and enjoy, are simply bacteria. Just the good kind. The kind that makes a fermented food a superfood. And cures everything from cancer to ingrown toenails, if you believe all the hype anyway.
But why bother making your own, when the stuff is so wildly and widely available at every deli and supermarket? It's all about the taste. And the possible health benefits.
So with a little patience as the bacteria slowly does most of the work, sauerkraut is about to become your new best friend!
Sauerkraut is another name for fermented cabbage. The fermenting process is performed by beneficial bacteria. It has fiber, and several important vitamins and minerals, including iron. It is also high is salt, so it is recommended that you rinse the 'kraut before consuming.
The process to make sauerkraut is very easy. Shred the cabbage (or buy pre-shredded stuff, but it'll be expensive), mix well with salt, then shove into a jar. That's pretty much it! Just two ingredients. No vinegar whatsoever ... it gets it's sour taste from the fermentation. No water is needed either, except to possibly top off the jar, and that's only if needed due to evaporation.
Do not try to use table salt instead of the kosher persuasion! Kosher salt has larger crystals. Table salt grains are too fine and might throw off the fermentation process.
By the way, I lied. There is a third ingredient ... time. You can't rush kraut. It'll be edible after maybe 3 days to a week, but it's much better IMHO if you wait another week or so. Totally worth the wait. I let mine ferment two weeks, but your taste, as well as your kitchen's temperature, might vary.
Anyway, down to business:
Sauerkraut ... from Scratch!
Adapted from: thekitchn
Yield: about 1 quart
1 head cabbage (about 3 pounds) or the equivalent in bags of pre-shredded cabbage
1 1/2 Tbl. kosher salt
1 Tbl. fennel or caraway seeds (very optional)
Wash a 2-quart mason (also called a "canning") jar, smaller glass or jar that will fit into the mason jar, lid, and any cutting equipment you use (cutting board, knife, mandolin, food processor and blade, whatever) with hot soapy water, making sure to rinse completely. Wash your hands as well.
Remove and discard outer leaves. Remove a crisp inner leaf and set aside. Carefully cut the cabbage into quarters, then cut away the core. Cut each quarter into sections that will fit your food processor or mandolin, otherwise (assuming here that you will be slicing by hand) cut each quarter again in half lengthwise for easier handling.
 |
| I'm gonna need a bigger bowl. |
Toss in the salt evenly, then start to grab and squeeze the cabbage, rubbing in the salt as you go. No need to be gentle here. Continue to massage the cabbage until the salt starts to draw out the liquid and the cabbage starts to soften a tad. Depending upon your cabbage (and how tired you get), this will take anywhere from 5 up to 10 minutes. If you want, optionally sprinkle and toss in fennel or caraway seeds; toss shreds to distribute evenly.
Take handfuls of cabbage and pack it into the jar, pushing down the cabbage as you go to fit it all in. Depending upon the original size of the cabbage head (and how much fell on the floor as you shredded) the jar will be 3/4 to almost full. Pour in any accumulated liquid.
 |
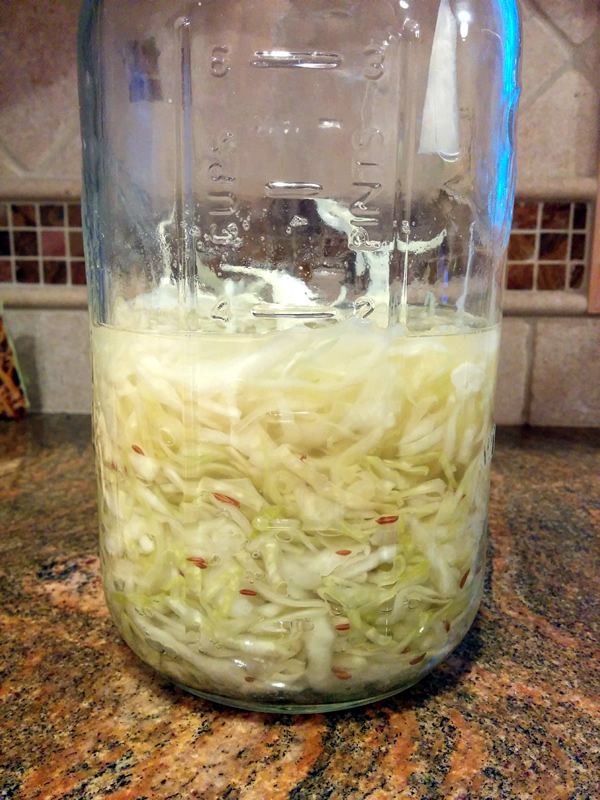
| Shreds after a few days. Those little brown things are caraway seeds. I didn't care for the taste and omitted it from future batches. |
Take that reserved cabbage leaf and lay it on top of the salty shreds. Place the smaller glass or jar on top of the leaf. Fill it with clean marbles, metal pie weights or water. Use the glass and its weight to press down further on the shreds.
Cover the jar with a clean kitchen towel or cheesecloth and use a rubber band to secure it. Place the jar on a rimmed plate on the kitchen counter out of direct sunlight, or in a cool basement. Fermentation will work most efficiently if the temperature is between 65F and 75F. If the kitchen is hotter than 75F, there is a possibility of bad bacteria taking over and ruining the batch. If the temperature is lower than 65F, fermentation will still take place, but it will be slower and take much longer.
Every so often during the next 24 hours, remove the towel and press down on the inner glass to help the cabbage release liquid and to keep the shreds submerged. If you are lucky, after 24 hours there will be enough liquid released to completely cover the shreds. If you are more like me, add enough salted water (at a ratio of 1 teaspoon to 1 cup water) to submerge it all. The cabbage needs to stay down to prevent the possibility of mold.
If bubbles start to appear in the cabbage or foam collects on the top, that's the fermentation process and is totally harmless.
 |
| This is after about 10 days. Starting to look like "real" kraut! |
After a few days, taste. When its to your liking, you have sauerkraut! Otherwise, leave it another 3-5 days, pressing down on the glass every so often, and repeat the taste test (topping off the inner glass as well if you used water as the weight).
 |
| This batch, without the seeds, after around 2 weeks or so of fermenting. More to my liking. |
When done, remove the towel, inner glass and whole leaf. Cover jar tightly with its lid, and refrigerate. Keeps fine in the fridge for up to 2 months. To enjoy, remove the amount you plan to serve and rinse in cold water to remove excess salt before serving.
Comments
Post a Comment
Comments are appreciated! Any spam or improper language will be detected and deleted.